How to Replace RV Roof?
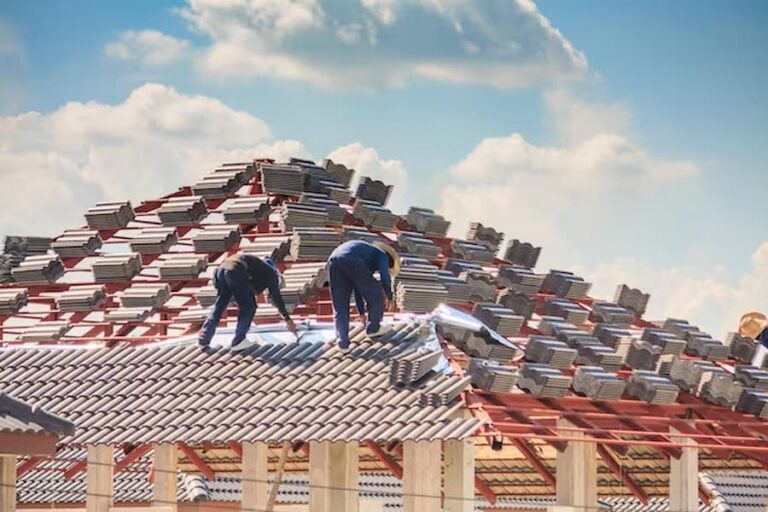
RV roofing is a very popular choice of many homeowners, but do you they know how to replace RV roof? To replace RV roof is not an easy task but with proper preparation and tools one can do it easily. Before to start guide you one thing should be clear, a professional roofer can assist you well instead of doing it self.
Moreover, a professional roof replacement needs some specific tools as well as materials. It is very helpful if you have all the necessary thing before to start a project.
In this blog post you’ll learn how to replace RV roof, what are the material required and some basic guideline about roofing. Further, to start RV roof replacement, you will need safety gear, ladder, sealant, adhesive, putty knife, caulk gun and roofing nails.
Let’s start step by step process of how to replace RV roof.
What Is RV Roofing?
RV roofs are made of synthetic rubber and butyl tape. These two materials are durable and protective in extreme temperature as well as weather. These materials also protect you from UV radiations. So, these types of roofs used for vehicles, fifth wheelers, travel trailers and camping buses.
To replace RV roof requires exact measurements and specials tools, so the best way to replace and install RV roof is to depend on professional roofers. But if you decide to replace it yourself, then be careful and read all the necessary instructions.
Before to start RV roof replacement, it is important to inspect the roof damage, leakage and other faults. This initial assessment can save your money as well as time.
Determine the Right Materials
The first step to install or replace RV roof is to determine best roofing material available in the market. Most of the experts recommend TPO and EPDM rubber. Moreover, the fiberglass is also a perfect option due to it’s low maintenance cost and labor.
Below are the 4 options of material for RV roofs available in the market and also recommended by the experts.
- TPO
- EPDM Rubber
- Fiberglass
- Aluminum
You can choose any of the material according to the requirements, cost, durability, longevity and labor. Here is the comparison of all the RV roofing materials, you can check and select which suits you.
Assess the Existing Roof
After selecting material, the next step is to assess your RV roof. How much work and time required to complete the project. There are few points to follow for better assessment.
- Inspect roof condition
- inspect major and minors damage area
- Calculate cost of the material
You should also take pictures of any damage you see and take note of any areas that appear to be leaking. This can help you determine how much work needs to be done and the best replacement materials for your roof.
Additionally, you should research the most cost-effective materials for your roofing project, as some materials can cost significantly more than others.
Research the Best Replacement Materials
When it comes to replacing an HV Roof, it’s important to research the best replacement materials available. Butyl tape, along with other materials such as furrion setup parts, is essential for any roof replacement job. While additional cost may be incurred when replacing materials such as accessories hitch locks, truck camper accessories, interior and exterior accessories, or living room accessories, these expenses are well worth it in the long run.
When researching, don’t forget to look into accessories recovery gear powersports, hitch fifth wheel hitches, 5th wheel pins, and drawtite 5th wheel hitches. Adapters, such as those used for safe cooking, should also be taken into consideration. By researching all these options, you can make the right decision for your HV Roof replacement.
Prepare the Rv for the Replacement
Before replacing an RV roof, it is essential to clean the roof surface and inspect it for any leaks or damage. Photos of any damage should be taken to assess the extent of the work needed. Then, the old roofing material must be removed and replaced with new plywood.

Butyl tape is used to seal the joints, while additional repairs may be necessary depending on the severity of the damage. Finally, new roofing material can be applied to complete the replacement. It is important to research local repair companies for replacement costs and to ensure the job is done correctly.
Clean the Roof Surface
With great trepidation, the time had come to prepare the RV for the replacement of the roofing material. The first step was to clean the roof surface, ensuring that any debris, dirt, and grime were removed. A boat cleaning product was used to ensure that the surface was thoroughly cleaned.
DIY ways of cleaning the roof surface were explored, but it was determined that the boat cleaning product was the best way to ensure a thorough and safe cleaning.
After the cleaning, butyl tape was used to secure any loose material, and any damage or water damage was documented with photos to provide a visual reference for the replacement costs. With the roof surface now clean and debris-free, it was time to begin the roofing material replacement.
Test for Leaks and Damage
With a careful eye and a steady hand, it’s now time to test for leaks and damage before proceeding with new roofing material. First, inspect the roof surface for any irregularities, and be sure to photograph any damage you find for reference later.
Then, use a combination of butyl tape and sealant to patch any existing holes or tears. If you find any signs of water damage, determine the source of the leak and whether any additional repairs are needed. Additionally, inspect your RV interior for signs of water damage, such as water stains or mold.
Once you have patched any existing leaks and taken care of any additional repairs, you can move on to applying the new roofing material.
Applying New Roofing Material
Now that the right materials have been chosen, it’s time to prepare the RV for the roofing replacement. To ensure a successful installation, the roof surface must be completely clean and free from any debris or dirt. Using a power washer can quickly and easily remove any dirt and grime and any potential mold and mildew. After washing, inspect the roof for any signs of damage or leaks and take photos of the damage for reference.
The next step is applying the new roofing material. To help secure the roofing material, butyl tape should be applied to the edges and seams as an additional layer of protection. Make sure to apply the butyl tape evenly to ensure a secure fit.
Install the New Roof
Cutting and fitting the materials is the first step in installing the new roof. Affiliate links and menu links can help guide the process. To replace the air conditioner shroud, butyl tape is necessary to secure it. When replacing the shroud, it is important to take damage photos for your records.
Accessories like hitch locks and truck camper accessories are also necessary to provide a secure fit. Interior and exterior accessories, including living room accessories, accessories recovery gear, and powersports, can help make the installation process smoother. To finish the installation, fifth wheel hitch and 5th wheel pin boxes, as well as hitch adapters, will be needed.
Cut and Fit the Materials
To properly install the new roof, the next step is to cut and fit the materials. Careful consideration must be taken when selecting the appropriate replacement materials, as they may vary in size and strength. First, all the interior and exterior accessories must be removed, such as the air conditioner shroud, hitch locks, and recovery gear.
Once the accessories are removed, the new plywood must then be cut to size. Once the pieces are cut, they must be fitted directly to the roof. Butyl tape should be used to seal the edges and create an additional layer of protection. Finally, the replacement shroud, fifth wheel hitch, and other accessories must be reinstalled in order to complete the installation process. Happy clicking!
Secure the New Roof
With the new roof cut and fitted to the RV, it was time to secure the replacement. To begin, the team used a combination of screws and butyl tape to form a tight seal. They were careful to install the screws in the right locations to ensure the roof stayed firmly in place. The team then inspected the roof for any gaps or signs of leakage.
To ensure a secure hold during travel, the team added more screws to the roof. They also added a layer of butyl tape to the edges to prevent water from seeping in. Once the new roof was securely in place, the team tested it with a hose to make sure no water was entering the RV.
Seal the Edges and Seams
Sealing the edges and seams of an RV is an important step in protecting your investment. To achieve this, apply caulk to the seams to fill any cracks and crevices. Use sealant to the edges to protect against any water intrusion.
Additionally, cut and install EPDM sealing tape along the seams to add additional protection. It is also important to ensure any replacement air conditioner shrouds, accessories hitch locks and hitch, interior and exterior accessories, recovery gear and powersports, fifth wheel hitch, and toy hauler garages are properly sealed.
Apply Caulk to Seams
Now that the new roof is installed, the next step is to seal the edges and seams. This will help ensure that the roof is waterproof and secure against any potential water damage. To do this, a caulking gun is used to apply caulk to the seams, which helps to seal the edges of the roof and prevent water from seeping in.
After the caulk is applied, a sealant is then applied to the edges to further ensure that the roof is waterproof. Finally, a special EPDM sealing tape is cut to size and installed over the caulk and sealant, making the roof even more secure. These steps will help protect the RV from any water damage and ensure a long-lasting and secure roof.
Apply Sealant to Edges
Having finished the hard work of installing the new roof, it is now time to seal the edges and seams. This is an important step that helps to ensure the roofing material lasts as long as possible. One way to do this is to apply sealant to the edges of the roofing material.
First, make sure the area is clean and free from debris. Then, use a brush, roller, or caulk gun to apply a strip of sealant around the roof perimeter. Make sure to press the sealant firmly into any joints and seams as well.
This will help to keep out moisture and other elements that can cause damage to the roofing material. It is also important to use a sealant specifically designed for the type of roofing material being used.
Cut and Install Epdm Sealing Tape
Now that the new roof has been successfully installed, the next step is to cut and install EPDM sealing tape to seal the edges and seams. This will help to keep out water and other elements that might compromise the integrity of the roof.
The EPDM tape is made of a thick synthetic rubber and is designed to be durable even in extreme temperatures. To ensure a successful installation, it is important to measure and cut the tape to fit around all edges and seams of the roof. Once the tape is in place, it should be secured with a sealant to ensure that it won’t come loose. This will help to protect the roof and keep it safe from the elements.
Complete a Final Inspection
In the final inspection, we must check for any gaps, test for leaks, and examine all joints and seams for any damage. We can start by replacing the shroud and any other RV accessories, such as hitch locks and interior accessories. Next, we can check all recovery gear and fifth wheel hitches for any damage.
We should also check the functional cookies and other top posts for any damage. Lastly, we must inspect the cookie policy and cookie settings, the top vehicle brands, and any van life and truck camping accessories for any damage.
Check for Gaps
After sealing the edges and seams to ensure the roof is completely watertight, it’s important to check for any gaps in the roofing material. Gaps can be caused by a multitude of factors, such as a roof that is too small for the area it is covering, or a roof that has become damaged over time.
If any gaps are found, they may need to be filled with replacement material such as plywood or a butyl tape. Additionally, if any accessories such as hitch locks, fifth wheel hitch, recovery gear, interior accessories, or exterior accessories have been added to the roof, it is important to make sure they are securely attached and not creating any gaps. If any gaps are found, additional repairs or replacement costs may need to be taken into account.
Test for Leaks
Having sealed the edges and seams of the roof, the next step is to test for any leaks. Doing so requires a thorough examination of all joints and seams for any signs of damage. In particular, the roofing contractor should pay close attention to the areas where the roofing material is connected to the roof, such as at the replacement shroud or other accessories such as hitch locks and hitch adapters.
Additionally, the interior accessories such as recovery gear and powersports accessories should be checked as well. Finally, the contractor should also examine their fifth wheel hitch for any signs of damage.
To test for leaks, the contractor should start by spraying water on the roof from the outside. This will help them observe any potential gaps or cracks in the roofing material that could allow for leaks.
Examine All Joints and Seams for Any Damage
Finally, it’s time to examine all joints and seams for any damage. This step is crucial for ensuring that the sealant was properly applied. Check each corner and along the edges for any gaps or breaks. Inspect the roof for any punctures that may have occurred during the installation. If there are any holes, patch them up with replacement material like new plywood before you proceed.
Additionally, take a look at the accessories like hitch locks, fifth-wheel hitches, and other exterior accessories that may have been used during the installation. Make sure all the accessories are tightly secured and in working order.
Finally, don’t forget to inspect the interior accessories like recovery gear, powersports, and van life truck camping accessories for any signs of damage.
Conclusion
Replacing an RV roof can be a difficult and daunting task, but it can be made easier with the right knowledge and tools. The first step is to determine the right materials needed for the job, from the new plywood to the butyl tape. After properly preparing the RV, the new roof can be installed, and all edges and seams should be securely sealed.
To finish the replacement process, a final inspection should be conducted to ensure that everything is of the highest quality and standard. With the right steps, an RV roof can be replaced in a safe and efficient manner.