How to Replace a Flat Roof?
How to replace a flat roof? Replacing a flat roof is a complicated process that requires a professional who is experienced in commercial roofing. From the removal of the old roofing to installation of new material, a roofing contractor can provide the highest quality of craftsmanship and ensure that your building is outfitted with the best materials available.
For those looking to replace their flat roof, it’s important to understand the different types of materials available and the associated costs. Flat roof costs are typically between $4 to $13 per square foot and the total cost of replacing a 1,000 square foot commercial flat roof ranges between $3,100 to $10,000.
The installation process includes the removal of a single layer of old roofing, ventilation, roof drains, and extra underlayment. Working with a skilled commercial roofing contractor is essential to ensure a fast and effective installation process.
Prepare the Roof for Replacement
When the question arise how to replace flat roof the first thing is to consider is preparation. Preparing the roof for replacement is a job that requires careful consideration and expertise. As a roofing contractor, it is essential to inspect the roof for damage, remove old roofing materials and repair any structural damage before any new materials are installed.
There are many types of roofs, including flat roofs, metal roofs, sloped roofs, green roofs, GRP roofs, single-layer roofs, slanted roofs and modified bitumen roofs. Each roof type will require different material types, so it is important to identify the correct materials for the specific roof.
Inspect the Roof for Damage
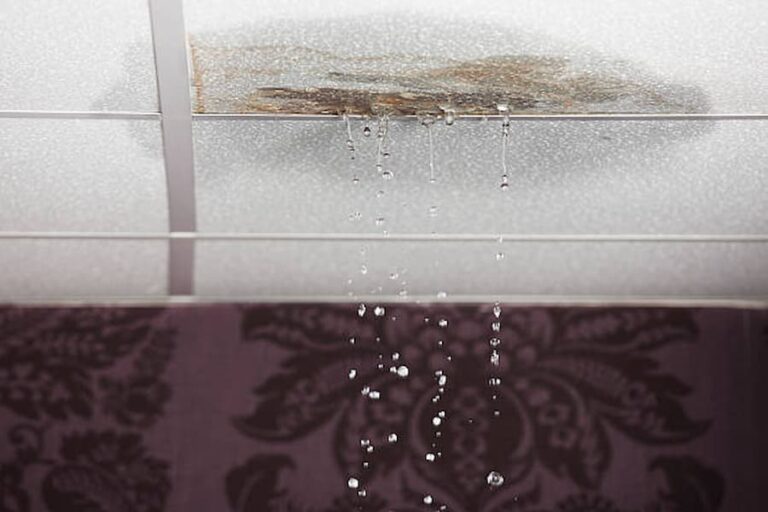
To ensure the success of a roof replacement, the condition of the roof must be thoroughly inspected. Flat and low-sloped roofs are especially prone to water damage, as water easily pools on the roof and can cause extensive damage.
Many flat roofs are single-layer roofs, making them the simplest roofs and requiring frequent replacements. Low sloped or pitched roofs are a bit more complex, but most are made from the same material types. A popular choice is a PDM membrane, which is a rubber-based, waterproof material with a silicon coating.
Inspection of the roof should include the roof’s age, visible damage, impact damage, and the condition of the drainage system.
Remove Old Roofing Materials
Before starting the process of roof replacement, it is important to remove the old roofing materials. On flat roofs, removing the existing materials may be relatively easy. Sloped roofs, however, may be more difficult and require professional assistance.
Single-layer roofs may be the easiest to remove, but many flat roofs are made up of multiple layers of different building materials. This could include polyester reinforced membrane (PDM) membranes, insulation, and an underlayment base sheet.
When replacing these flat roofs, fewer materials may be needed for the job, such as just a new underlayment base sheet and insulation replacement. At this stage, it is also important to consider a drip edge replacement, along with any decking repairs.
Repair Any Structural Damage
Moving on from inspecting the roof for damage, it’s important to repair any structural damage before replacing the roof. Structural damage can be caused by many things, such as weather, age, roof leakage, and improper installation.
Flat roofs, for example, are particularly prone to water damage, since they are designed to be water-resistant rather than waterproof. Single-layer flat and low-sloped roofs, in particular, can be made of PDM membranes, which are known for their durability and longevity.
However, even these roofs can suffer from structural damage if they are not properly maintained. Replacement decking repairs, for instance, can be an important step in the 4-step installation process for a new roof.
Choose the Right Roofing Materials
When choosing the right roofing material, it is important to consider different materials, insulation, and drainage. Fiberglass GRP, EPDM rubber, and TPO are all popular options for flat and low-sloped roofs.
Reader success stories and community Q&A tips suggest one should factor in the roof’s age, labor costs, and top deciding factors when selecting a material. Consider the 4-step installation process for a single-layer roof, including a metal drip edge, replacement jobs, new insulation, and a built-up tar roof.
Consider Different Materials
When replacing a flat roof it is important to consider different materials. Flat and low-sloped roofs are best served with single-layer membranes such as EPDM and Thermoplastic Polyolefin (TPO).
These materials are more flexible than metal roofs and provide better waterproofing than slanted or pitched roofs. With proper installation and maintenance, these materials can easily last 15 to 50 years.
Another great option is Fiberglass GRP, which is a composite material made of plastic and glass fibers. This material is durable and easy to repair, making it a popular choice for flat roofs.
Though flat roofs can be simple to replace, there are a few other factors that need to be taken into account.
Consider Insulation and Drainage
Once the roof is prepped and ready for replacement, the next step is to start considering the different materials available for flat and low-sloped roofs. It’s important to choose the right materials, as they’ll be responsible for waterproofing the space and protecting the structure from the elements.
One of the top deciding factors when choosing the right materials is considering insulation and drainage. To ensure proper drainage, a flat roof must be built with a slight pitch of at least ⅛ inch per foot. This allows water to run off the roof, instead of sitting on it.
Calculate the Amount of Materials Needed
If you’re replacing an existing flat roof, you’ll need to calculate the amount of roofing materials necessary to complete the job. The amount of material needed is determined by the size of the roof and the type of material used. It’s important to weigh the pros and cons of different roofing materials, as they can vary greatly in terms of cost, longevity, and resistance to weather.
For example, fiberglass GRP roofs are popular and relatively affordable, but require a 4-step installation process that can be time-consuming. On the other hand, single-layer EPDM membranes are quick and easy to install, but may not be as durable as other flat roof materials.
Fiberglass Grp
It’s important to consider the various materials that are available when choosing the right roofing material for your flat or low-sloped roof. Fiberglass GRP is a popular material due to its strength, flexibility, and durability. It requires a 4-step installation process that involves the installation of a new insulation, a new underlayment base sheet, the actual GRP sheet, and lastly a silicon coating.
When considering Fiberglass GRP as a roofing material, there are several advantages to consider:
- Durable: GRP roofs are highly durable and can last for up to 50 years if installed correctly.
- Flexible: GRP roofs are flexible and easy to install.
EPDM Rubber
When it comes to flat and low-sloped roofs, EPDM rubber is one of the most popular materials. This single-layer roofing material is durable and reliable, providing an energy-efficient and environmentally-friendly solution for residential and commercial buildings. EPDM rubber can also be found in black and white varieties, although the latter costs more.
When considering EPDM rubber for roofing replacement, it’s important to understand the 4-step installation process and consider the major advantages and disadvantages of the material:
Advantages:
- Flexible and easy to repair
- Resists water and UV rays
- Highly durable
- Can be recycled
Disadvantages:
Tpo
When considering different flat roof materials for a commercial building, TPO is an attractive option that provides many benefits. TPO stands for thermoplastic polyolefin, a single-layer, flexible material that comes in sheets 10, 12, and 20 feet wide.
This material is ideal for flat and low-sloped roofs, and is easy to install due to its 4-step installation process. Durability and energy efficiency are key considerations, and TPO checks both of those boxes. It is fire-resistant, and its ability to reflect UV rays from the sun helps reduce energy bills. TPO also has a major advantage over older flat roofs, as it requires fewer materials and labor costs.
Built-up Tar
When it comes to installing flat and low-sloped roofs, built-up tar is a great option. This material consists of gravel and tar, which form a waterproof layer over the covering. It’s a great choice for residential commercial buildings, such as apartments and condos. It’s also easy to repair and maintain, making it a great option for those looking for a long-lasting roof.
The four-step installation process for built-up tar roofs is as follows:
- Prepare the roof: Remove any old material, and make sure the roof is clear of debris and any visible damage.
- Install a new underlayment base sheet: This will act as a waterproofing layer.
- Install the new insulation: It’ll protect your home with an extra layer.
Install the Underlayment
Flat roofs and single layer roofs require a 4-step installation process. The first step is to measure and cut the underlayment for the roof. This is an important stage, as it ensures a secure fit for the underlayment and reduces any potential air or water leaks.
Labor costs are also reduced as there is no need for frequent replacements of roofing material. Ross Bednar Flat Roofs recommends cutting the underlayment to fit the roof’s age and drainage system to ensure the right way is taken for the bottom line.
Measure and Cut the Underlayment
Now that the right roofing materials have been chosen, it is time to begin the 4-step installation process. The first of those steps is to measure and cut the underlayment. Flat roofs and single-layer roofs require a single layer of underlayment, while flat and low-sloped roofs will require two layers.
Measuring and cutting the underlayment is a critical step in the installation process, and it is important to do it correctly. It is best to measure twice and cut once to ensure a correct fit. The underlayment should be cut slightly larger than the roof deck to ensure the best coverage. It is also important to take into account any roof obstructions, such as pipes, vents, and skylights.
Secure the Underlayment
Secure the Underlayment, Once the roof is measured and cut with precision, the next step is to secure the underlayment in place. This is a critical step in the 4-step installation process because it provides the roof with a protective barrier against air and water leaks.
Flat roofs, or single-layer roofs, are usually built with a membrane that is either synthetic or rubber. This is the most common type of material used for flat and low-sloped roofs.
For older roofs, it is important to inspect the drainage system and the roof’s age to determine whether or not the underlayment needs to be replaced.
Check for Air or Water Leaks
Once the underlayment has been measured and cut, the next step is to secure it. This is done by using special fasteners and adhesive. Depending on the type of roof and climate, some roofs may require additional fasteners for better protection.
After the underlayment is secured, the final step is to check for any air or water leaks. This is an important step to ensure the roof is secure and watertight.
Flat and low-sloped roofs require a 4-step installation process. The first step is to remove any existing roofing material, followed by installation of the underlayment. Then, the flashing is installed, and finally, the roofing material.
Install the Roofing Materials
Flat and low-sloped roofs require a four-step installation process when replacing existing roofing materials. The first step is to measure and cut the roofing materials to the appropriate length and size. This is the most important step as the accuracy of the measurements will determine the overall success of the installation.
Once the materials have been cut, the roofing materials can be installed. It is important to ensure that the materials are correctly sealed around the edges to prevent any water or moisture from entering the home. The major disadvantage of single-layer roofs is the lack of a drainage system, leading to higher labor costs.
Measure and Cut the Roofing Materials
Taking the 4-Step Installation Process to the next level, the next step is to measure and cut the roofing materials. Many flat roofs are single-layer construction, so the measurements must be precise. For flat and low-sloped roofs, the materials must be cut to fit the roof’s shape. In some cases, the roofing contractor will need to adjust the measurements for the drainage system and other elements.
This is a critical step in the installation process since the roofing materials must be cut accurately to ensure a watertight seal and prevent any future water damage. Related posts and reader success stories suggest that investing in quality materials and taking the time to measure and cut them correctly will surely pay off.
Install the Roofing Materials
Having measured and cut the roofing materials to size, the next step in the 4-Step Installation Process is to install the roofing materials. Flat and low-sloped roofs generally require a single layer of roofing materials, while others may need multiple layers. The roofing materials are carefully installed over the underlayment and fastened into place with nails to ensure a secure fit.
Once all the roofing materials are in place, the seams and flashings are sealed to create a watertight seal. This is a critical step in the installation process and is usually done with a silicon coating. The edges of the roof are also sealed with a metal drip edge to help direct water away from the roof and protect it from water damage.
Seal Around the Edges
Once the roofing materials have been measured and cut, the final step in the flat roof installation process is to seal around the edges. This is important for ensuring that the roof is watertight and free from potential leaks. For single-layer flat and low-sloped roofs, the process is relatively fast and simple.
A silicon coating or specialized sealant is applied to the seams and edges of the roofing materials to create a waterproof barrier.
For more complex flat roofs with multiple layers, a more comprehensive sealing process must be performed, including the installation of a metal drip edge to protect the integrity of the roofing structure. This is why it’s important to hire a commercial roofing contractor with experience in the 4-Step Installation Process.
Check for Safety and Durability
Flat and low-sloped roofs are the simplest roofs to install and maintain, and they can be installed with a 4-step installation process. To ensure safety and durability, it is important to check for proper drainage, inspect for air or water leaks, and ensure that the roof is securely fastened.
For proper drainage, a single-layer roof should have a good drainage system in place, such as a drip edge, to protect against water damage. For flat roofs, a roofer should check for visible damage and impact damage, as well as inspect for air or water leaks.
Check for Proper Drainage
After installing the roofing materials, it is time to check for safety and durability. This includes inspecting for proper drainage, looking for air or water leaks, and ensuring the roof is securely fastened. Let’s focus on the first step: Check for Proper Drainage.
Flat and low-sloped roofs require a 4-step installation process to make sure the drainage is optimal. This process involves installing a single layer of flat roofs, securing the material, and adding a waterproof silicon coating to prevent water from pooling. The final step is to install a metal drip edge to ensure that rainwater is properly directed away from the roof.
It is important to periodically inspect the drainage system since any clogged gutters or downspouts may cause severe water damage.
Inspect for Air or Water Leaks
Having installed the necessary materials, it is now time to check for safety and durability. A critical part of this is inspecting for any air or water leaks, which is especially pertinent for flat and low-sloped roofs due to their single-layer construction. To do this, a roofing contractor must follow a four-step installation process.
First, the contractor must look for any visible signs of water leakage, such as discoloration or dampness. This is best done by lifting or removing any insulation boards that may be present. Next, a thorough inspection should be done for any signs of air leakage. This can include checking all seams, intersections, and edges, as well as looking for any gaps in the roofing material.
Ensure the Roof Is Securely Fastened
After installing the roofing materials, it is essential to check for safety and durability. Ensuring the roof is securely fastened is an integral part of this process, particularly with flat and low-sloped roofs. This 4-step installation process should be followed to guarantee a safe and secure roof:
First, identify any weak spots in the roof, making sure to check all corners and edges carefully. Next, measure the screws and nails used for fastening to ensure that they are the right size for the material being used. A screw or nail that is too small may not hold the material properly. Thirdly, make sure that the screws and nails have been securely and correctly driven into the roof.
Clean up and Dispose of Waste Materials
Flat and low-sloped roofs provide a useful 4-step installation process, but they also require frequent replacements for optimal performance. As part of the replacement process, it is important to remove debris from the roof, properly dispose of old materials, and clean up any nails or other debris.
Not only will this help ensure an effective installation, but it will also help avoid potential water damage due to clogged drains. To ensure a successful replacement, it is essential to take the time to clean up the existing materials. Removing nails, bits of flashing, and other debris from the roof can help ensure a safe and secure installation of the new materials.
Remove Debris From the Roof
After ensuring the roof is properly constructed for safety and durability, it’s time to focus on removing debris from the roof. Flat roofs, single layer roofs, and flat and low sloped roofs all require a 4-step installation process in order to construct and secure the roof properly.
This includes the removal of all debris from the roof, including any nails, screws, and other small pieces of material. This is important, as any metal left on the roof can lead to leaks and other issues.
In order to ensure the roof is free of debris, it is important to inspect the roof thoroughly. Paying attention to areas around the edges, corners, and flashing is especially important, as these are areas where debris can easily become lodged.
Dispose of Old Materials Properly
In order to ensure the safety and durability of a flat roof, it is important to properly dispose of any old materials from the roof. This 4-step installation process involves removing any existing debris from the roof, disposing of old materials properly, and then cleaning up any nails or other debris that may be present.
Before any new materials can be added, it is important to remove all old materials from the roof. This may include removing any old insulation, decking, and roofing membrane. All of these materials should be disposed of in a safe and responsible manner, according to local regulations. Once all of the old materials have been removed, it is important to properly dispose of them.
Clean up Any Nails or Other Debris
At the end of the day, all that is left is to clean up any nails or other debris that have been left behind. Flat roofs need to be meticulously checked for any nails or screws that may have been missed during the 4-step installation process. All materials should be disposed of properly, to ensure no further damage is done to the roof.
Carefully scan the roof for any nails that may have been overlooked. Pick them up and place them in a secure container that will be disposed of after the work is completed. Check for any other pieces of metal, plastic, or other debris and dispose of those as well. Larger items should be broken down into smaller pieces and thrown away separately.
Pros and Cons of Flat Roofs
Flat roofs can offer a variety of benefits to homeowners looking to upgrade their home’s exterior. Their 4-step installation process is often quicker and less costly than sloped or pitched roofs. The materials used to construct flat roofs are often fewer, and the roof itself can be easier to maintain.
However, their limited lifespan can be a hindrance. They are more prone to water damage, and their exposure to the elements can cause visible damage and even impact damage. The age of the roof should also be taken into account, as well as the labor costs associated with the installation process.
Pros of Flat Roof
The flat roof offers many advantages that make it an attractive choice for many commercial buildings. Compared to sloped roofs, flat roofs are much cheaper to build and maintain, provide increased flexibility for the building, and can lower utility bills. Additionally, the 4-step installation process is fast and easy, saving time and money.
When it comes to the pros of flat roofs, there are plenty of advantages to consider:
- Cost-Effectiveness: Flat roofing materials are much cheaper than materials for pitched roofs and the installation process is simpler and safer, which cuts down on labor costs.
- Flexibility: Flat roof material are flexible and easy to install.
Cons of Flat Roof
Rather than the simple four-step installation process of traditional sloped or pitched roofs, flat roofs present a few more challenges. Although flat roofs offer an increased degree of flexibility, there are some major disadvantages to consider. Firstly, because flat roofs are not ideal for very large buildings, additional measures may be needed to ensure the roof’s stability.
Additionally, flat roofing materials have a much shorter lifespan than that of sloped roofs, often needing to be replaced after 15 years.
Finally, the complex water drainage system of flat roofs requires a high-performing drainage system to be installed in order to avoid pooling, which can cause water damage. Therefore, when considering the pros and cons of flat roofs, it is important to weigh both the positive and negative aspects before making a decision.
Limited Lifespan
The limited lifespan of flat roofs should always be taken into consideration when deciding on the best roofing choice for your business. On average, flat roofs last around 15 years, but can last up to 30 years with proper maintenance. But when compared to pitched roofs that could last up to 50 years, it’s important to factor in the cost of frequent replacements.
Flat roofs require the 4-step installation process, which begins with the removal of the old roof, followed by the installation of a new waterproof material, such as a silicon coating. This is followed by the installation of insulation and finally, the installation of the drip edge.
Choose the Most Reliable Flat Roof Installation
Now that you understand the pros and cons of flat roofs, it’s time to focus on the installation process itself. Flat roofs require a specialized 4-step installation process to ensure the most reliable results. First, a waterproof material such as modified bitumen, single-ply membranes, or liquid-applied systems must be chosen.
Next, the new material must be cut and laid on the roof. Third, a silicon coating should be applied to ensure the roof is completely waterproof. Finally, the drip edge, insulation, and underlayment base sheet can be replaced to further strengthen the roof.
Ultimately, the choice of material used and the expertise of the contractor are the top deciding factors for a successful flat roof installation. Careful consideration should be taken to ensure the roof is installed the right way the first time.
With so many material types available, it is important to research and choose the most reliable flat roof material before the installation process begins. Hiring an experienced roofing contractor with a proven track record for flat roof installations is the best way to ensure the job is done correctly and the roof is reliable.
What Is the Cheapest Way to Cover a Flat Roof?
After ensuring that the flat roof installation is reliable, many people wonder what the most cost-efficient way to cover a flat roof is. Fortunately, there are several cost-effective solutions that can help you keep your home safe and dry.
One of the most popular options is a 4-step installation process, which includes preparing the roof area, installing a base sheet, adding a waterproof membrane, and then applying an appropriate coating. This process is relatively easy to complete and can be done in a few days with the right materials.
In addition to this installation process, you can also purchase materials separately and install them yourself. Many flat roofs can be covered with a single layer of asphalt shingles or a lightweight material such as metal. This is a great option for those who want to keep the cost of their roofing project low. However, it is important to note that this type of roof is not as durable as the 4-step installation process.
If you are looking for more cost-effective solutions, you can consider other materials such as modified bitumen or a combination of materials.
Conclusion
Flat roofs are a great option for many homes and businesses because they require fewer materials, have a low slop and are relatively easy to install and maintain. However, when it comes to replacement, the process can be complex and it’s best to leave it to a professional roofing contractor.
The contractor can assess the roof, identify any needed repairs and install a waterproof membrane and a durable underlayment along with the chosen roofing materials. With the right roofing contractor, you can ensure a safe and durable roof replacement that will last for years to come.